Often you will see a customized signature at the end of a blog post. Did you ever wonder how you could also implement a personalized signature on your own blog?
Well that is exactly what I will teach you today.
How To Create A Customized Signature
There are several ways to create a signature:
- Scan your real signature, upload it to your computer.
- Create a signature by using image software such as Photoshop, Snagit, Flickr, Tinypic or many others and then upload it to your computer.
- Go to My Live Signature, follow the directions to create a signature and save it to your computer.
How To Install A Customized Signature On A Blogger Blog
Method #1
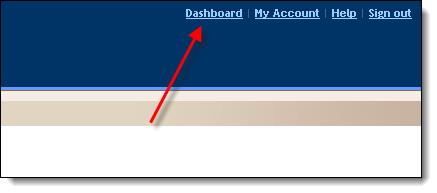
Click DASHBOARD
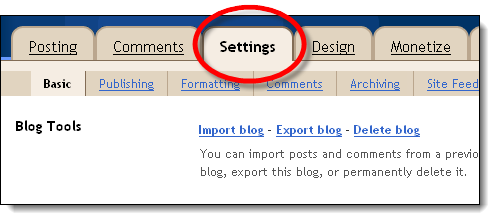
Click SETTINGS
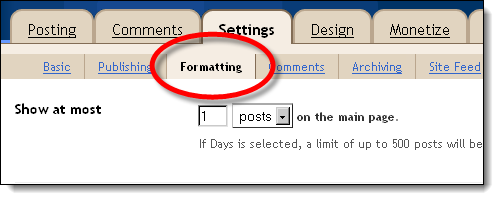
Click FORMATTING
Scroll down to the Post Template box
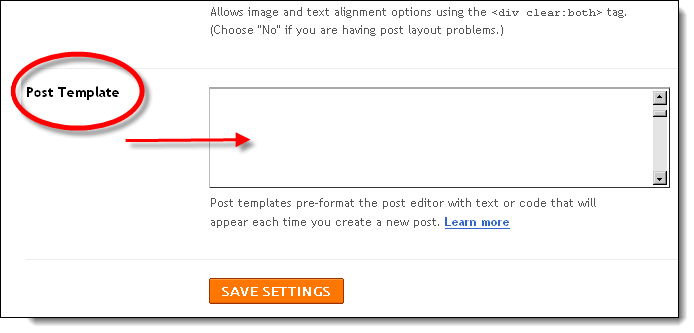
Insert the following code in the box:
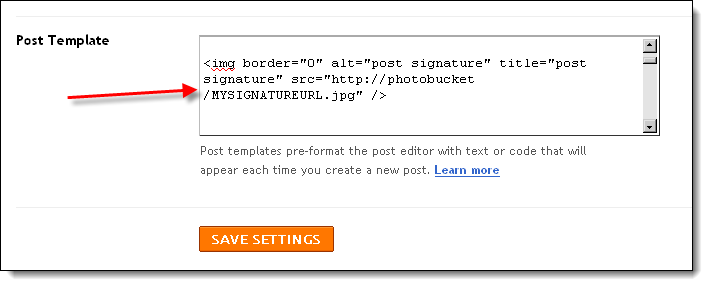
Copy the SIGNATURE IMAGE URL and PASTE it into the code in place of “YOUR SIGNATURE URL“.
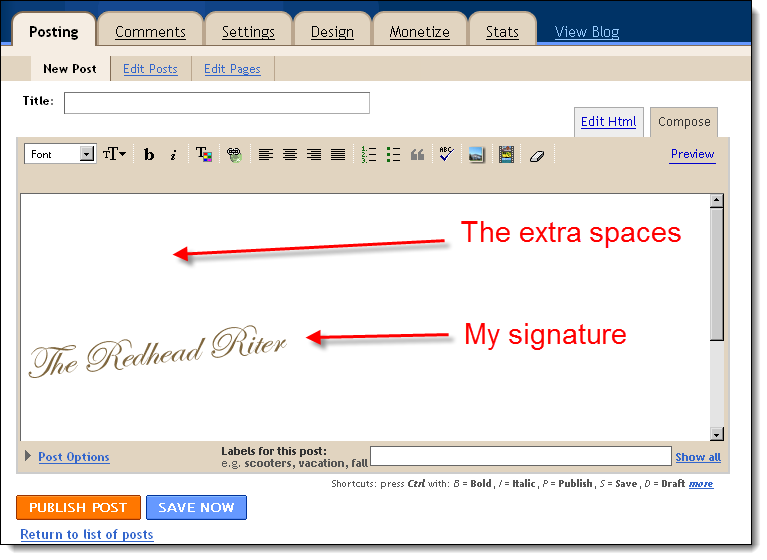
You can add the following code above or below the signature to add spaces if you desire to do so.
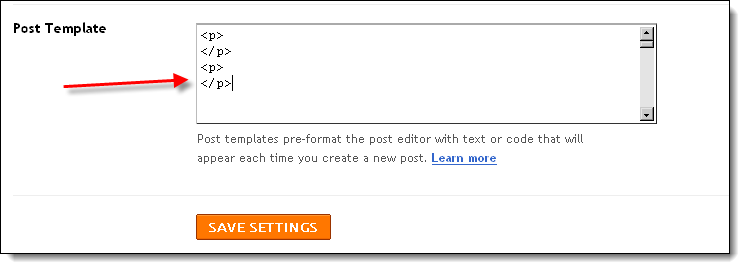
Click SAVE.
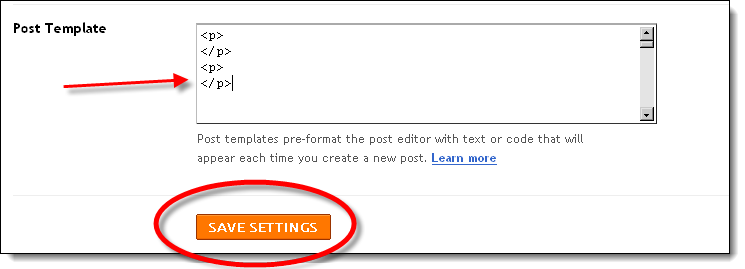
As an example, my code might look like this:
Pros for this method:
- Easy!
- If you have limited HTML knowledge, you can still do this signature method by yourself.
Cons for this method:
- You can easily delete it while preparing your post which means that you have to retrieve the code and plug it back into your current post.
- Your signature will appear from this day forward, but you will have to go back and manually insert the signature if you want it on all your past posts.
Method #2
Click DASHBOARD

Click DESIGN
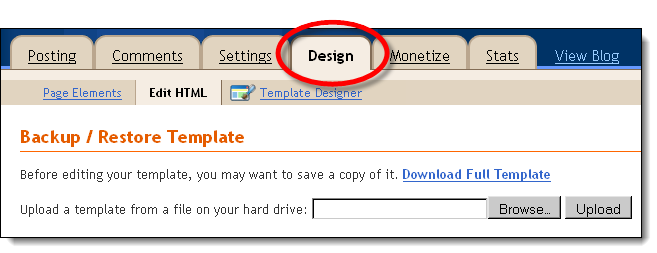
Click EDIT HTML
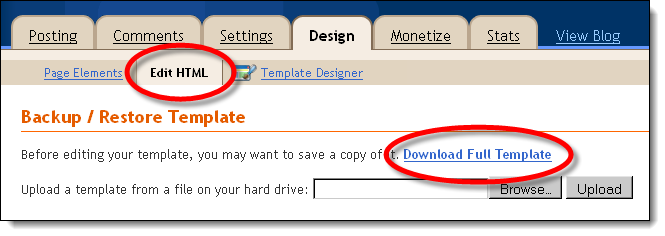
DOWNLOAD FULL TEMPLATE to save it in case you really mess up!
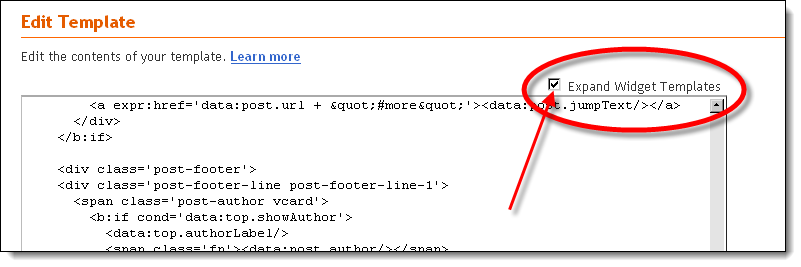
After the template is saved, click EXPAND WIDGET TEMPLATES
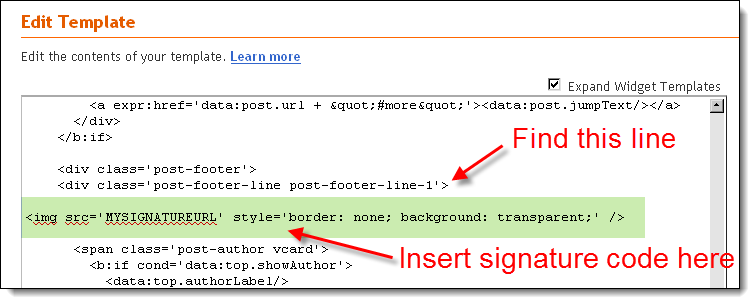
Find one the following codes in your template:
CODE A
If you are already panicky, remember, if you do not SAVE the work, you are not going to mess up your template. Just take a breath, get a drink of water and hurry back.
Feel better?
Good!
Let’s continue…
Under the coded line that you just found, paste the code below into your template.
Change the words MYSIGNATUREURL to YOUR SIGNATURE URL from Photobucket, Flicker or where ever you host your images.
Click PREVIEW and if it looks good, click SAVE TEMPLATE.

If you did not find CODE A, then you will use the directions below:
CODE B

Follow the same directions above except that you will plug the signature code into the middle of all the code that you found as shown below:

Click PREVIEW and if it looks good, click SAVE TEMPLATE.
Pros for this method:
- Your signature will appear on every post both past, present and future without you doing another thing.
Cons for this method:
- It is harder than the POST TEMPLATE method because of all the HTML coding in your blog template.
Well, I hope you find that enlightening! If you decide to put a customized signature on your blog, be sure to come back and tell me. Definitely be sure to put your blog in the LINKY so everyone can check out your handy work.
What do you think about the customized signature tutorial?
Woo Us To Your Blog
The last “Woo Us To Your Blog” post was about How To Make A Blogger Drop Down Menu – Navigation Bar so that your blog remains uncluttered and more organized. Do you remember the post and have you added one yet?
As always, attached is the weekly Linky to enter either the main URL to your site or add each post you publish throughout the week. You don’t have to do anything special, just drop your link in and get a little extra exposure to your site. If you have a product you want me to review, please send me an email too.
Until next week’s wooing post, have fun creating a customized signature!

Note: Linky Tools is performing a System Upgrade Sunday Morning at 1 AM which may last several hours. If you come by and the Linky below isn’t working, send me an email with the Post Link and the Photo Link you want to use and I will be sure to add it for you.
Yeah, I love ya!


Great post. Thanks. I'll try this.
Lou
I tried. With WordPress, you just need to save it and upload it as a picture.
Thanks Red!
Thank you so much!! How helpful!!
BlueCottonMemory – so on WordPress, how are you adding it to the bottom of a post … just adding the image?
Redheaded Riter – would you consider changing your comment settings to allow name and URL? Much easier for the likes of me …
Thanks again! You are making my blog better with every post.