So you want to blog and you’ve chosen WordPress as your platform, but now what do you do? How do you create a post and then publish it so that everyone can read it?
When I switched my blog from Blogger to WordPress, I was lost. Nothing about WordPress made sense to me and I think part of the reason was because I was scared that I was going to mess something up. If you have the same fear, just remember, if you publish something that looks wonky, you can delete it in a matter of seconds. 😀
How To Create A Post In WordPress
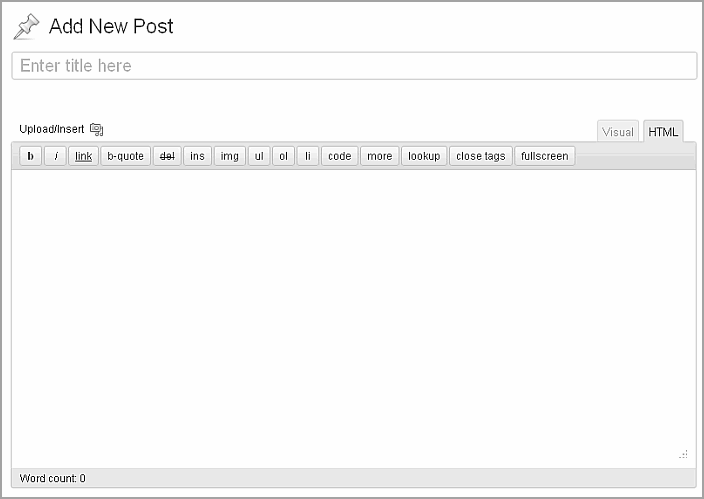
Let’s start from the very beginning. While on the DASHBOARD, you will see a whole bunch of options along the left side. One of the options is POSTS. Hover the cursor over POSTS and a popup box will appear. In the popup box, click ADD NEW because we want to add a new post.
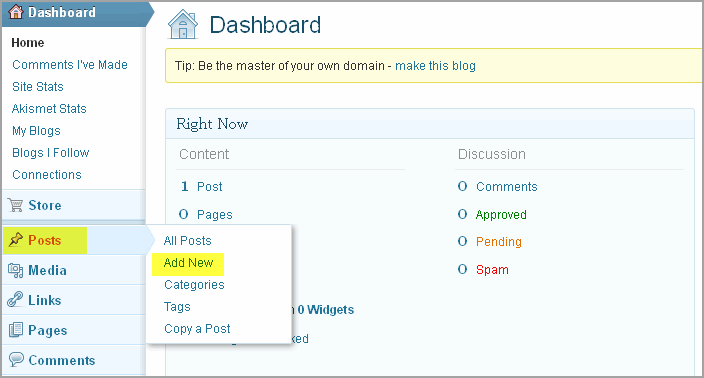
After clicking ADD NEW, a new blank post will appear in the main body of the screen. You will still be able to see the bar of choices on the left of the screen.
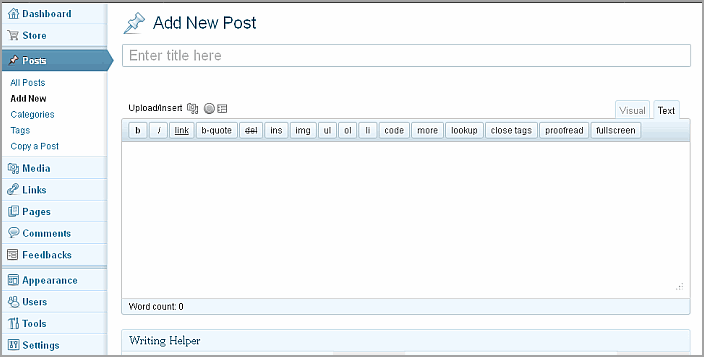
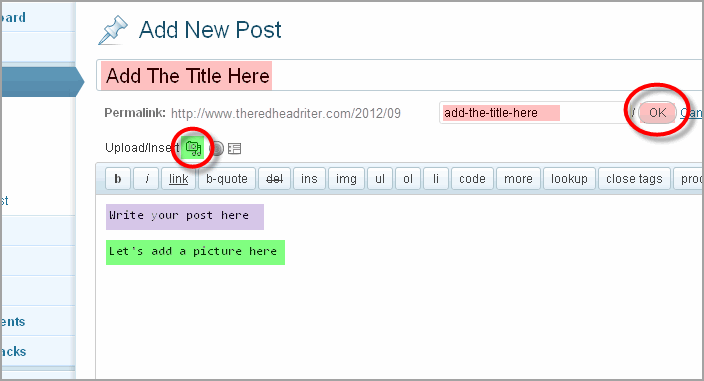
The empty rectangular box under the words ADD NEW POST is where you add the TITLE of the post. After the TITLE is added and the post saved as a DRAFT, the PERMALINK or POST URL will be created. In the example below, “Add The Title Here” is the TITLE of the post.
As you can see, the PERMALINK or POST URL will be https://theredheadriter.com//2012/09/add-the-title-here. By clicking OK next to the link, it will be set as the PERMALINK or POST URL.
If you change the title before you publish the post, you can go back and change the PERMALINK or POST URL too. See how that works?
The actual post is written within the big empty box which is shown with the PURPLE highlight.
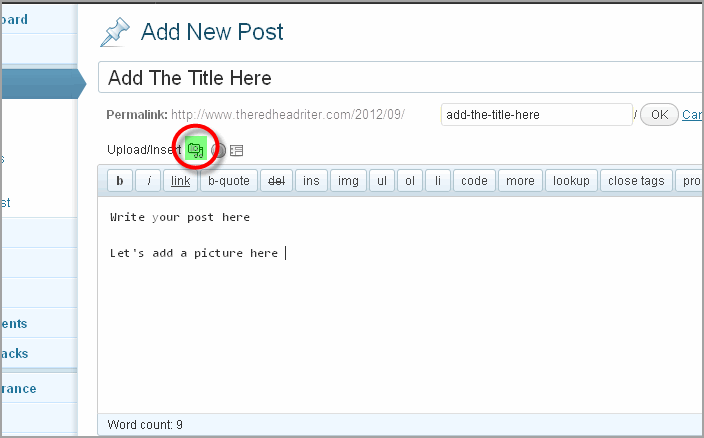
The GREEN highlighted CAMERA/MUSICAL NOTE ICON is what you click to add a photo in your post.
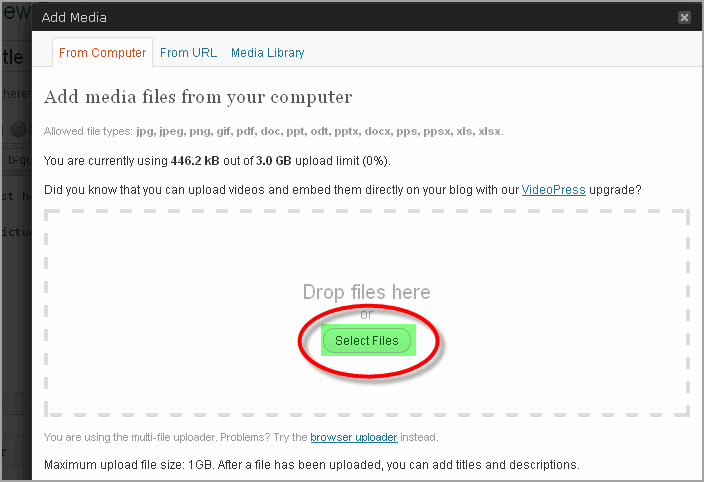
After clicking the CAMERA/MUSICAL NOTE ICON another screen will popup. This screen is the ADD MEDIA popup. Now we have to find the photo we want to add to the post. Click SELECT FILES.
Another box will pop up, but this should look more familiar to you. Within this box you will see all the files on your computer and you can navigate to the photo you want to use in your post.
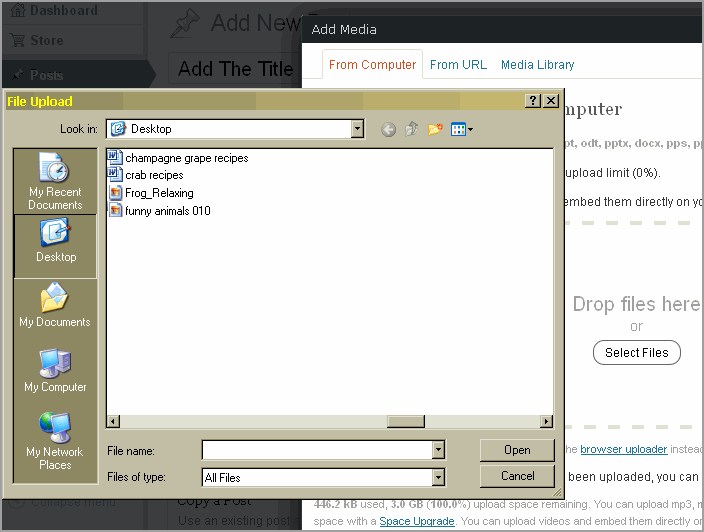
Click on the photo you want to insert into the post and then click OPEN.
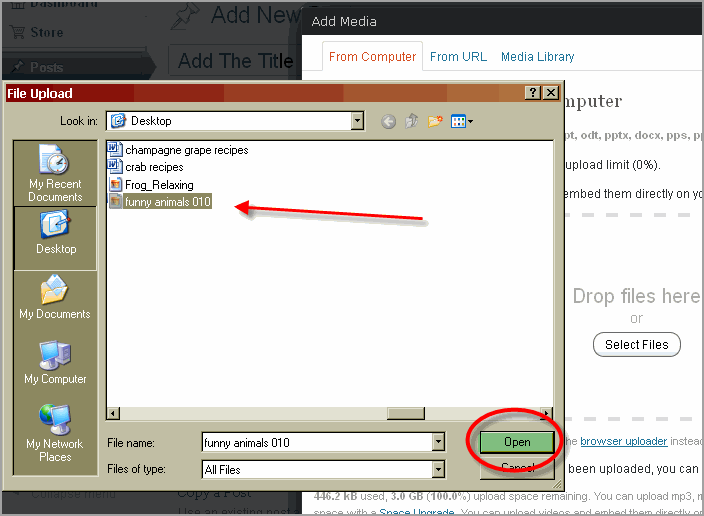
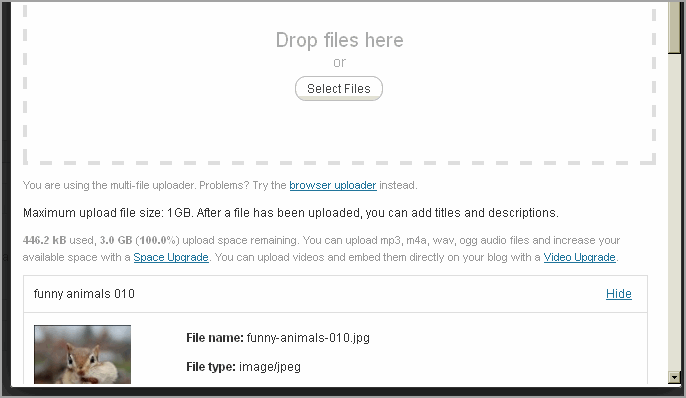
The photo will be uploaded.
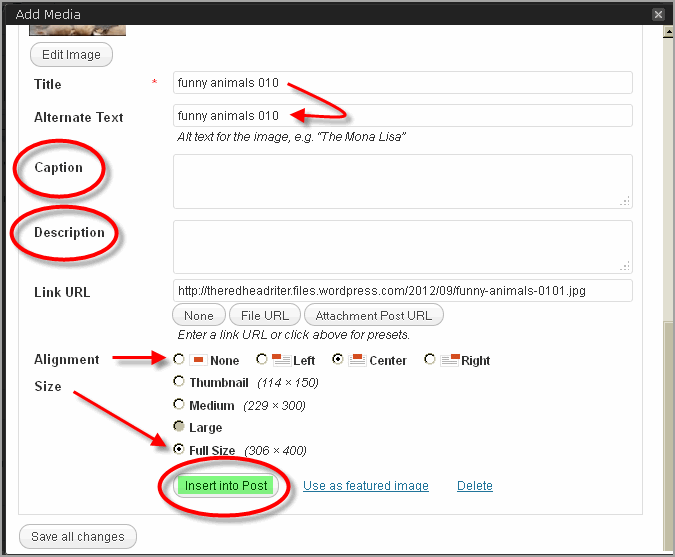
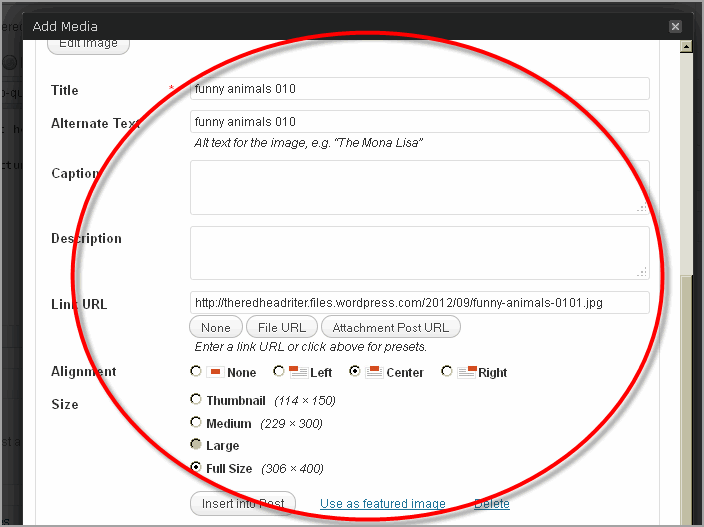
The name of the file will automatically populate in the TITLE.
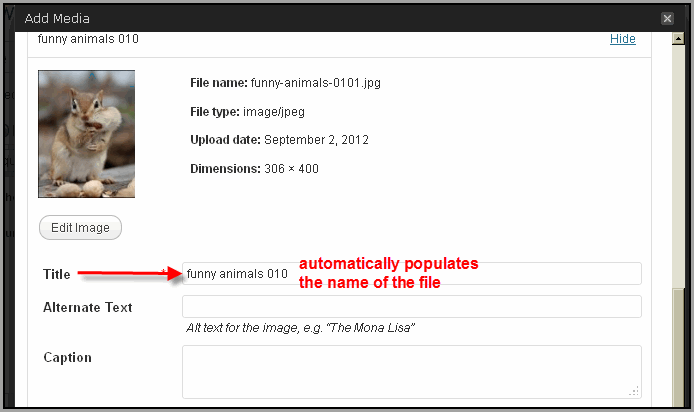
Add the same words you used in the TITLE to the ALTERNATE TEXT box below it.
At this point you can also add a CAPTION or a DESCRIPTION to the photo, but they are not necessary.
You do need to choose the ALIGNMENT of the photo: NONE, LEFT, CENTER or RIGHT aligned. ALIGNMENT is the position of the photo within the post. For instance, you may want the photo centered on the page.
Also choose the SIZE that you want the photo to be within the post.
After making all those choices, click INSERT INTO POST.
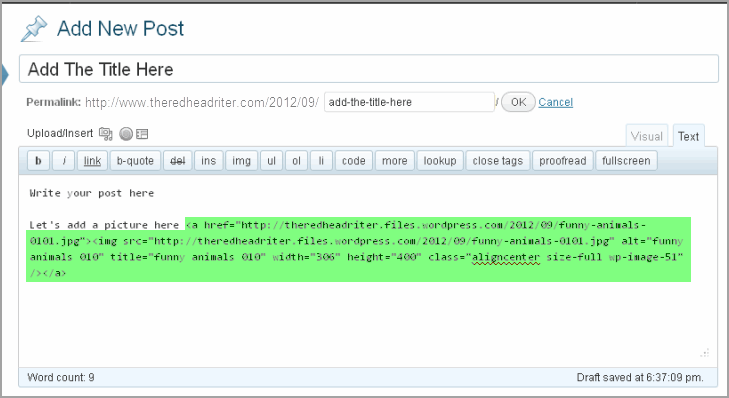
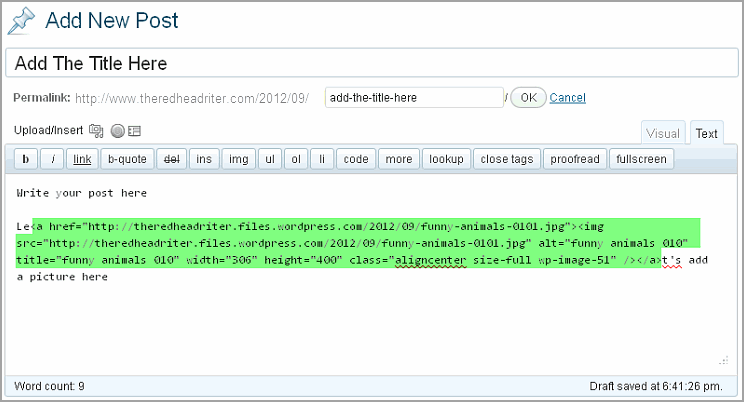
The photo will now appear in the post where the cursor was before you clicked the CAMERA/MUSICAL NOTE ICON. The name, size and alignment of the post will all be included in the code of the photo.
There is also another way to add a photo to a post. We start out the same way. Place the cursor in the post and click the CAMERA/MUSICAL NOTE ICON which is highlighted below in GREEN.
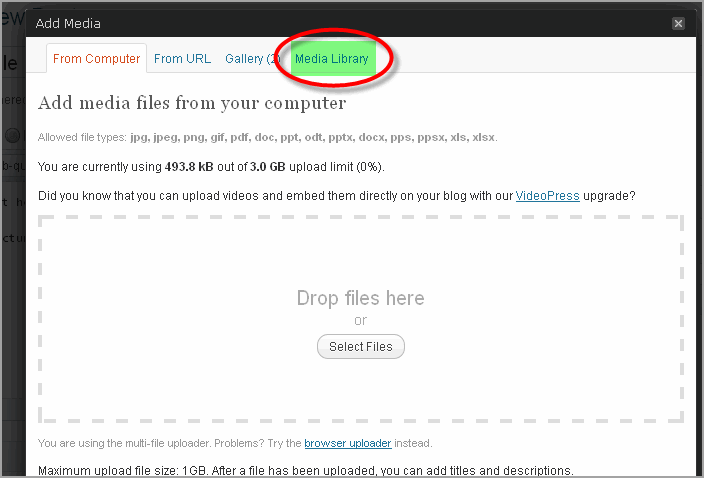
The ADD MEDIA popup box will appear, but this time click the tab called MEDIA LIBRARY.
All the pictures that have been uploaded into the MEDIA LIBRARY will appear. Find the photo you want to add to the post and click SHOW next to that photo.
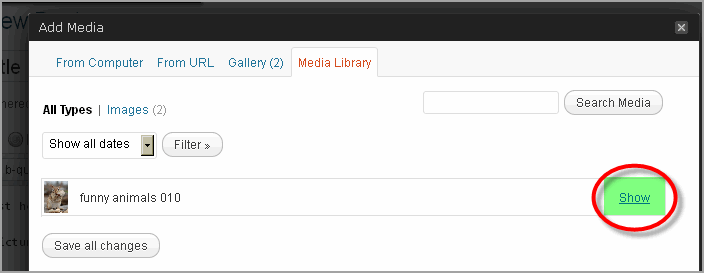
Fill in the information in the same way that I showed you earlier and then click INSERT INTO POST.
The photo code has now been added in the post. Do you notice anything else? No? Okay, well, let’s just continue.
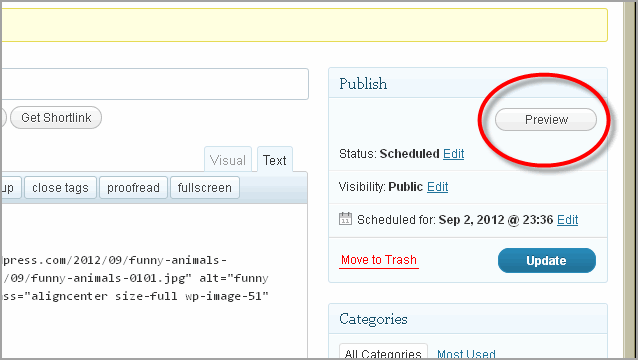
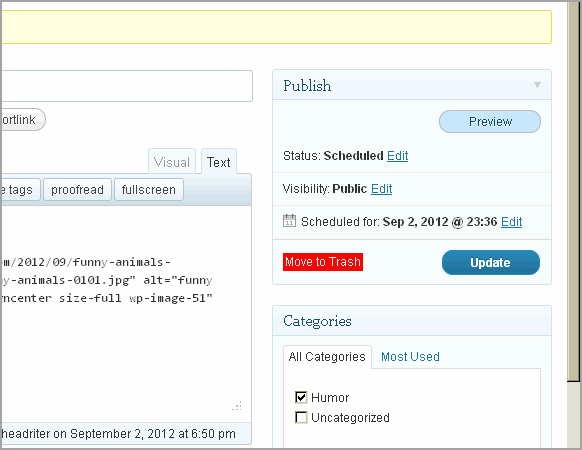
On the right of the post box, in the right side bar, there are other options that need attention. One option is PREVIEW. At any time while writing the post, you can click PREVIEW and see how the post is coming along.
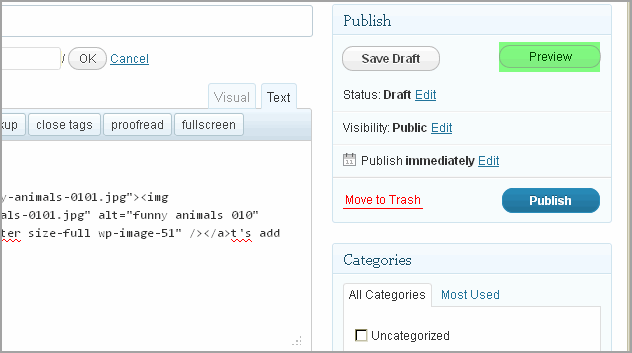
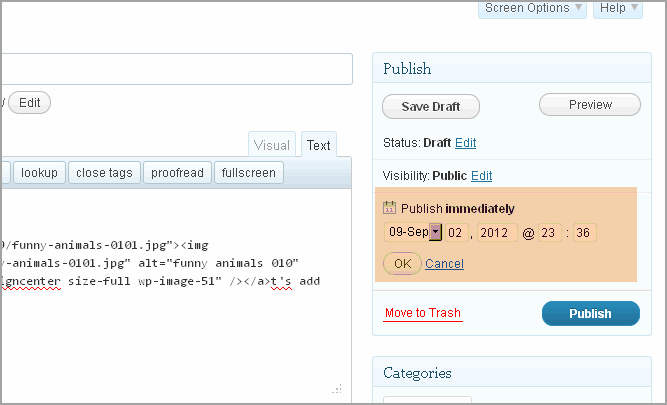
You can also choose when to PUBLISH the post. The post can be published immediately or it can be programmed for some time in the future. Simply add the time in military time and click OK.
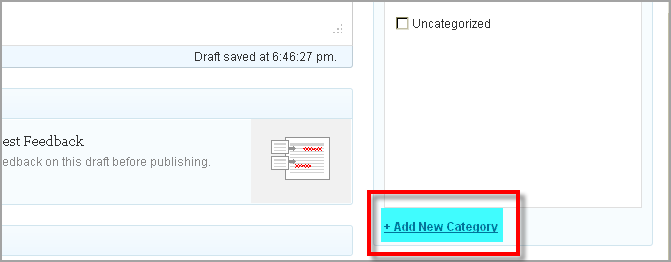
I’m assuming that you will have different topics on your blog, so it is necessary to create categories. Click ADD NEW CATEGORY.
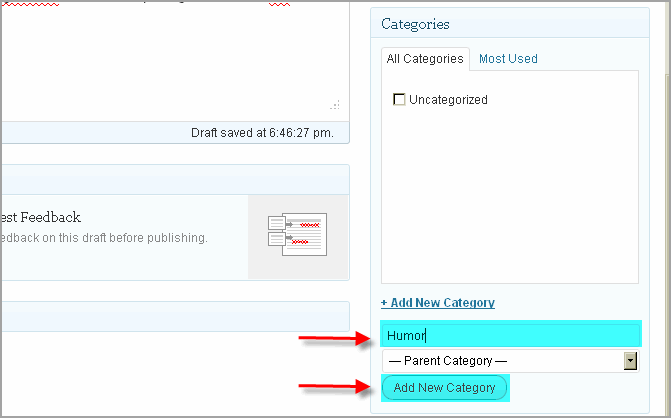
A box beneath the words will appear. That is where you type the name of the new category and then click ADD NEW CATEGORY.
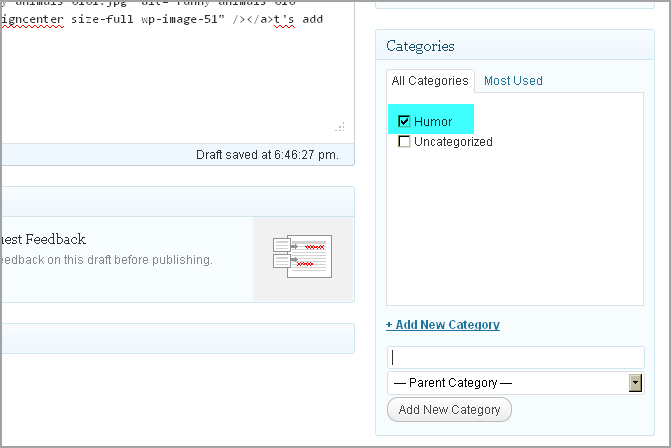
TaaDaa! A NEW CATEGORY has been created and a check mark immediately appears next to that category. What this means is that we are identifying and categorizing this post as a funny post, so it will be under HUMOR. Going forward, we will check HUMOR for every post that is funny. Does that make sense?
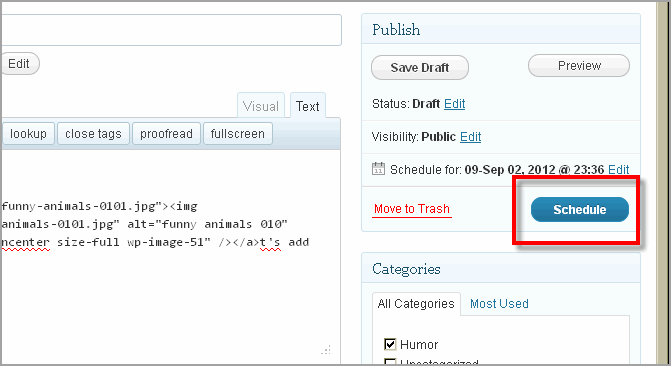
When you are all finished with the post and have chosen the time you want it to be published, click SCHEDULE.
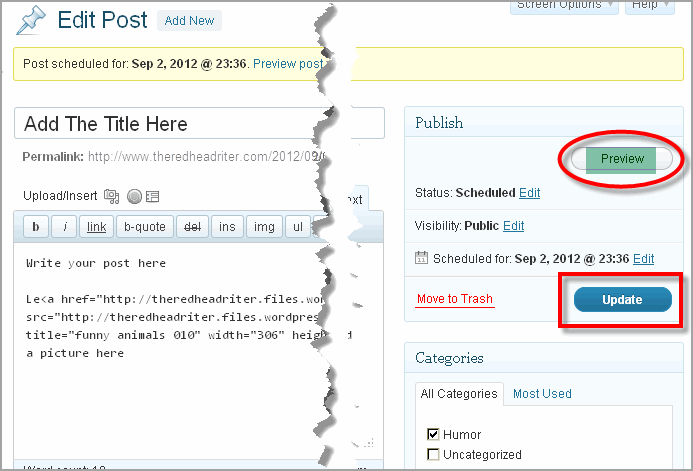
After the post has been scheduled, above the title, the words POST SCHEDULED FOR: followed by the date and time you chose. Let’s see how the post will look, so click PREVIEW.
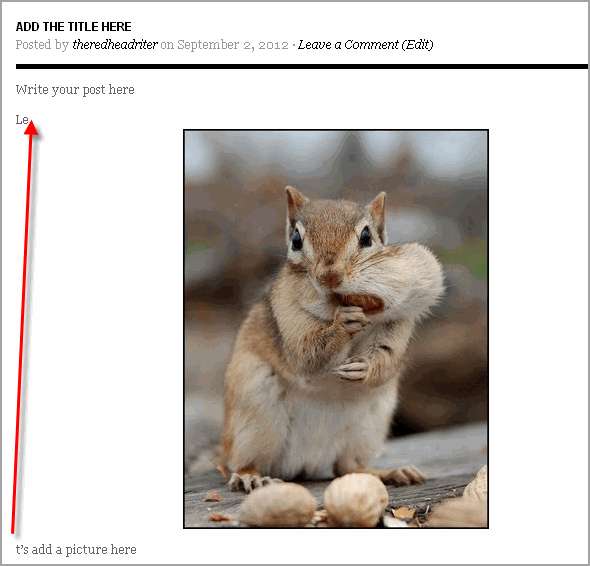
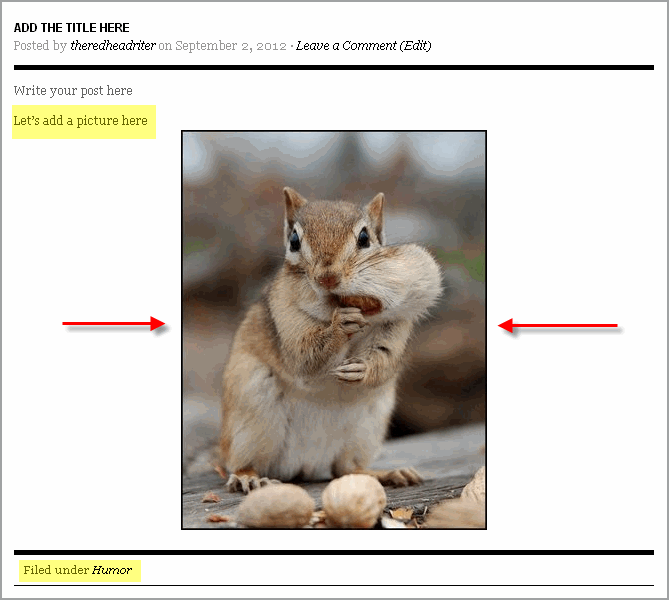
Oh my! What do you see? We loaded the photo right in the middle of our sentence! Let me give you a little advice. NEVER publish or schedule a post before you preview it!!!
Let me show you how to fix the mess. Go back into the post and correct the wording by putting it all together in front of the photo code.
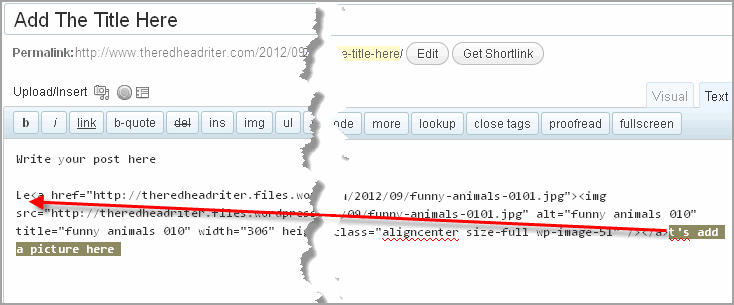
UPDATE and PREVIEW it.
Now it looks better!
Just in case you write a post in anger and decide it is better if no one ever reads it, there is a fix for that too. Click MOVE TO TRASH and that post is a goner!
If you have the THESIS theme, the DASHBOARD and POST BOX will look a little different, but you will create a post and upload photos the same way.
The advantage of THESIS is that you will have more options for each post. For instance, you can add META KEYWORDS which will help with the SEO (Search Engine Optimization).
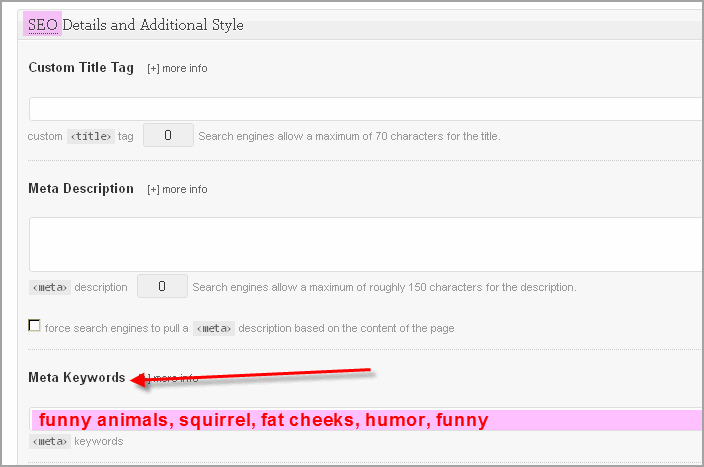
If you want to use the BEST theme for WordPress, Thesis is the real deal.

When I build websites for people, I use THESIS. I not only prefer it, but I am also an affiliate for THESIS. There’s always a bright yellow THESIS AD in the right sidebar of my blog, so click it if you ever decide to change your current site or create a new one.
If you are interested in individual blogging lessons or want me to build your blog, contact me and we can discuss your needs. Thirty minute increments is enough information at one time and won’t tax your brain! I’m probably the most patient teacher you’ll ever meet, so if you want to learn, give me a holler.
Now that my post is finished, I’m going to preview it to make sure nothing looks wonky! 😉


Wonderful tutorial, as always! You missed just one thing… how to stop procrastinating or hesitating, & finish & release a post! :/
LOL LOL LOL Well, my dear Skip, that is rather a hard thing to teach! One of my most favorite quotes is by Arnold H. Glasow, “Success isn’t a result of spontaneous combustion. You must set yourself on fire.” So what exactly can you do to set yourself on fire and that is meant figuratively? Maybe deprive yourself of that first cup of morning coffee if you don’t publish a post the night before. Do you think that would motivate you? LOL
Redhead Riter, GREAT TUTORIAL! Now, I have no excuse for not posting on my blog! 🙂
You wrote, “If you are interested in individual blogging lessons or want me to build your blog, contact me and we can discuss your needs. Thirty minute increments is enough information at one time and won’t tax your brain! I’m probably the most patient teacher you’ll ever meet, so if you want to learn, give me a holler.” I would like to give you my personal endorsement. YOU ARE, WITHOUT A QUESTION OF A DOUBT, THE MOST PATIENT TEACHER I HAVE EVER COME ACROSS IN MY LIFE WHEN IT COMES TO TEACHING BLOGGING. You taught me everything I know about blogging. (Well, you didn’t teach me how to write, I have to take a little credit and say that I did know how to write! LOL) But I do give you credit for teaching me how to publish my posts and pictures – and everything else I needed to learn about blogging and believe me there was plenty of tips that you taught me!
I’ve said it once and I’ll say it again, “If you could teach me how to be computer savvy, you can teach anyone! I was not computer savvy at all, but thanks to you, I am now computer savvy!” 🙂
As far as I am concerned you are THE BEST WEB DESIGNER out there! You designed and built both of my blogs for me – http://www.abadmarriageisfattening.com and http://www.richbeyondmywildestdreams.com. I love what you did with both of my blogs, and I love how patient you were with me to give me exactly what I wanted! I have to say, “You have the patience of a saint!” I know that whoever hires you to design and build their blog, they are going to be thrilled with the results, and they are going to be equally as thrilled with how easy you are to work with! 🙂
“Now, I have no excuse for not posting on my blog!” You sure don’t have any excuses at all now!!!
“YOU ARE, WITHOUT A QUESTION OF A DOUBT, THE MOST PATIENT TEACHER I HAVE EVER COME ACROSS IN MY LIFE WHEN IT COMES TO TEACHING BLOGGING.” Thank you, Joan, but that is actually one thing I do believe about myself. I AM very, very patient! 😀 I love that about me!
I enjoyed designing your blogs and it gave me great satisfaction to know that every single thing you wanted on it, I was able to do for you. I’m so glad you like them!
Just moved over from blogger to wordpress so found this post very helpful. Like the theme I’ve chosen but it’s not right yet. Alarmed by how few hits I’m getting at the moment compared to old blog. Has this been a ghastly mistake…..? So many questions so little time. Like this contact form by the way…could I do this plus picture or is that outta of my league?
I’m so glad you found it helpful!
So I jumped over to your blog and would you like a suggestion? I hope so because here I go…Only have one post show up at a time so that the columns will be about the same size. 🙂
You said you have a lot of questions, so click on the BLOG TIPS tab under my header and see if you can find your answers here on my blog.
I didn’t understand your question. Where do you want to put the picture on your comment page? Do you mean like the picture of the pen I used? I would have to check out your theme to see if you can make those changes. Did you pay for your theme from a designer?