
So often on the Woo Us To Your Blog posts, I have people who ask me “How do I get my blog in that Linky thing you use?”
I’m going to make it easy for you today with a tutorial. No matter where you go on the web, if you want to enter your blog on a LINKY the steps will be about the same.
It is very easy to do. Let’s start…
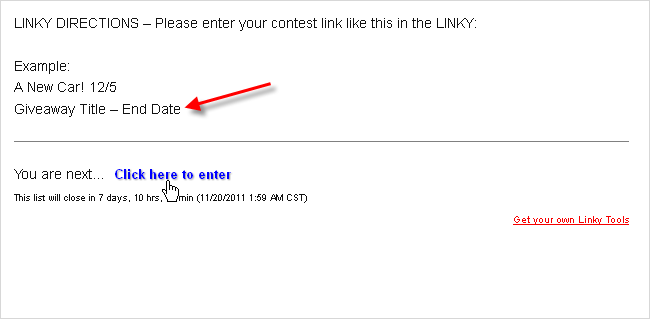
STEP 1
Notice the format the hosting blog requests that you use when posting a link in the LINKY. For giveaway posts, most of the time the format is “Giveaway Title” followed by “The date that the giveaway ends”.
Other times that a LINKY is used, you may be asked for the name of a particular post and your name or your blog’s name.
After you determine the format for the link entry, click the words CLICK HERE TO ENTER.
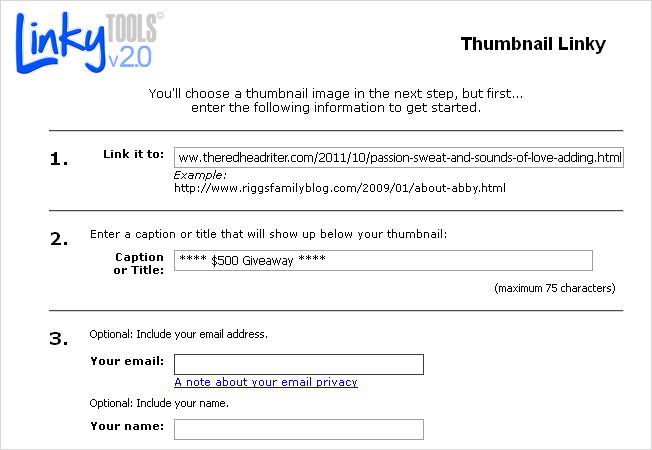
STEP 2
At this point, you’ll have a pop up either on the page or in a new window. For my LINKY, I use the thumbnail option and have it open in a separate window.
Enter the link to the post or your main blog URL.
Next, enter the title of your post or your blog.
You do not have to put your email address or name because neither appear for the public.
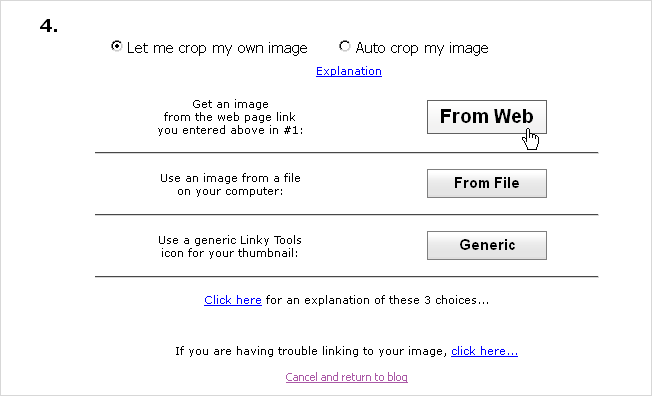
STEP 3
This next step, choosing a picture for the thumbnail, is the step that confuses most people.
There are two radio buttons (that’s the round circles with a dot in one of them) and you have to choose whether the photo you use should be cropped by you (“Let me crop my own image”) or randomly cropped by the program (“Auto crop my image”). I suggest that you crop your own image so that you have a little more control of the part of the photo that will be shown in the LINKY.
Now you have to choose the image you want to appear in the thumbnail.
If you have pictures on your blog, you can choose the option FROM WEB which is what I will show you in this example.
FROM FILE means that you have the photo stored somewhere and you can provide the URL of the photo to drop in. The photo would be hosted somewhere like Photobucket or your site’s media file.
GENERIC is some icon that has nothing to do with your blog, so it is best not to choose it.
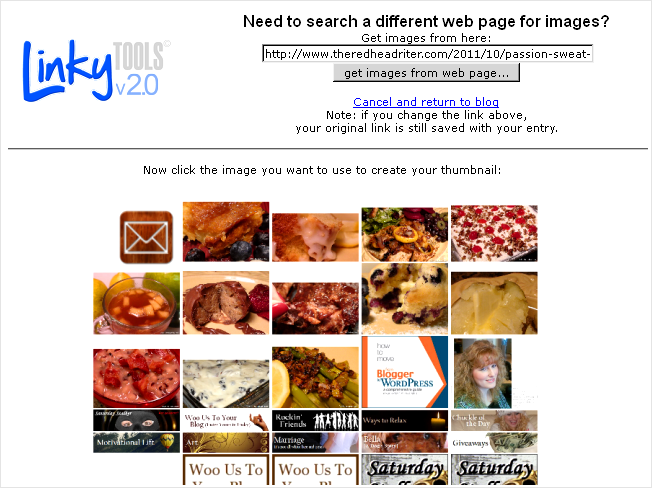
STEP 4
Since you chose FROM WEB, many of the pictures found on your blog will appear including the ones found in the post you chose to link up.
Click on the picture you want to use in the LINKY.
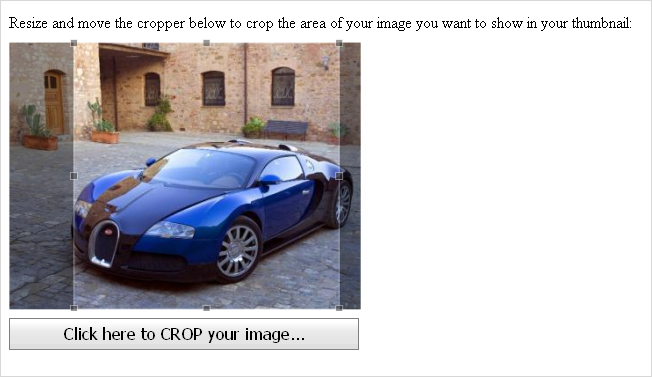
STEP 5
You will have yet another page appear with the image you have chosen to crop.
Adjust the amount of the image that will be shown by clicking on the lighter part of the picture and sliding it left and right. You can also click on the gray dots along the edge and make the highlighted square larger.
When you have the picture cropped to your specifications, click the words, CLICK HERE TO CROP YOUR IMAGE…
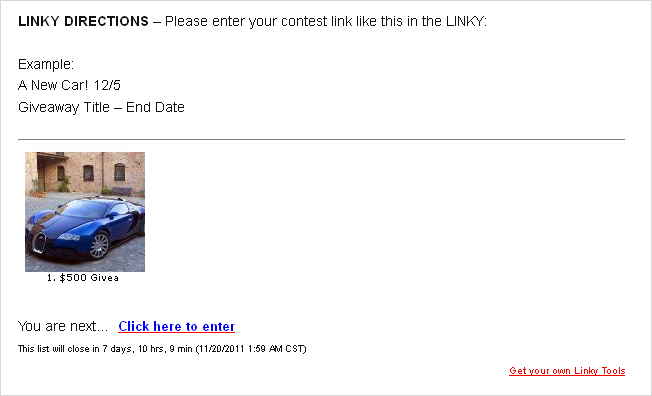
STEP 6
Now you will be taken back to the original blog where you will see the image you just cropped linked to the URL on your blog that you had previously chosen. Underneath the picture, the title of your giveaway, blog or post will appear.
You’re finished!
Woohoo!
Was entering the information into the LINKY easier than you thought and less complicated?
I hope so!!!


Leave a Comment